 |
| Easiest Ever Cinnamon Rolls No Knead, Refrigerator Rise, Whole Wheat, Oil Free, Vegan |
And, goodness knows, buying them from a grocery store can or box isn't the ideal solution.
Well, those days are over!
These Cinnamon Rolls are the easiest you've ever heard of. They take about 15 minutes of hands on time (5 minutes to create the dough, 10 minutes to form). I provide lots of pictures and instructions below for every detail - which might make it LOOK a little tricky - but it's VERY easy and fast! They're no knead and refrigerator rise. You don't even need a rolling pin. And, they're much healthier than other recipes. They're Whole Wheat, and Vegan. Free of Butter and Eggs. They're also Oil Free! Perhaps best of all, my daughter and her friends don't seem to realize that they're whole wheat!
This is my own recipe, but I got the method from Artisan Bread in Five Minutes a Day - whose work I highly recommend!
Easy Soft, No Knead Whole Wheat Cinnamon Rolls
(Makes 2 batches - for a one batch recipe, see my Whole Wheat Rolls post)
I prepare a double batch of dough in a plastic shoe box from the dollar store
.
Be sure to add ingredients in this order:
3 Cups Warm Water
5 Cups White Whole Wheat Flour
1/4 Cup Tapioca Starch (you can substitute Cornstarch, if you like)
1 Cup Potato Flakes (yes, the kind people make instant Mashed Potatoes with)
1/2 Cup Sugar*
1 Tablespoon Yeast
1 Tablespoon Salt
Stir well with a spoon till well combined and no floury patches remain. If it is VERY hard to stir, and doesn't look like the picture below, you can add a couple more Tablespoons of Warm Water.
 |
| Dough after stirring |
Cover loosely (I put the shoe box lid on, but don't snap it down on one corner) and allow to rise for 2-5 hours on counter.
 |
| Dough after initial rise - ready to place in fridge or use. |
Place in Fridge till needed, or use right away (ideally, use this within a week)
When you're ready to bake, sprinkle the top of the dough generously with flour.Oil a cake pan. (If you absolutely cannot have oil, line the pan with parchment paper instead of oiling). If you prefer individual Cinnamon Rolls with defined edges (like in the above right picture with the red background), you can pop each one into a cupcake pan rather than a cake pan.

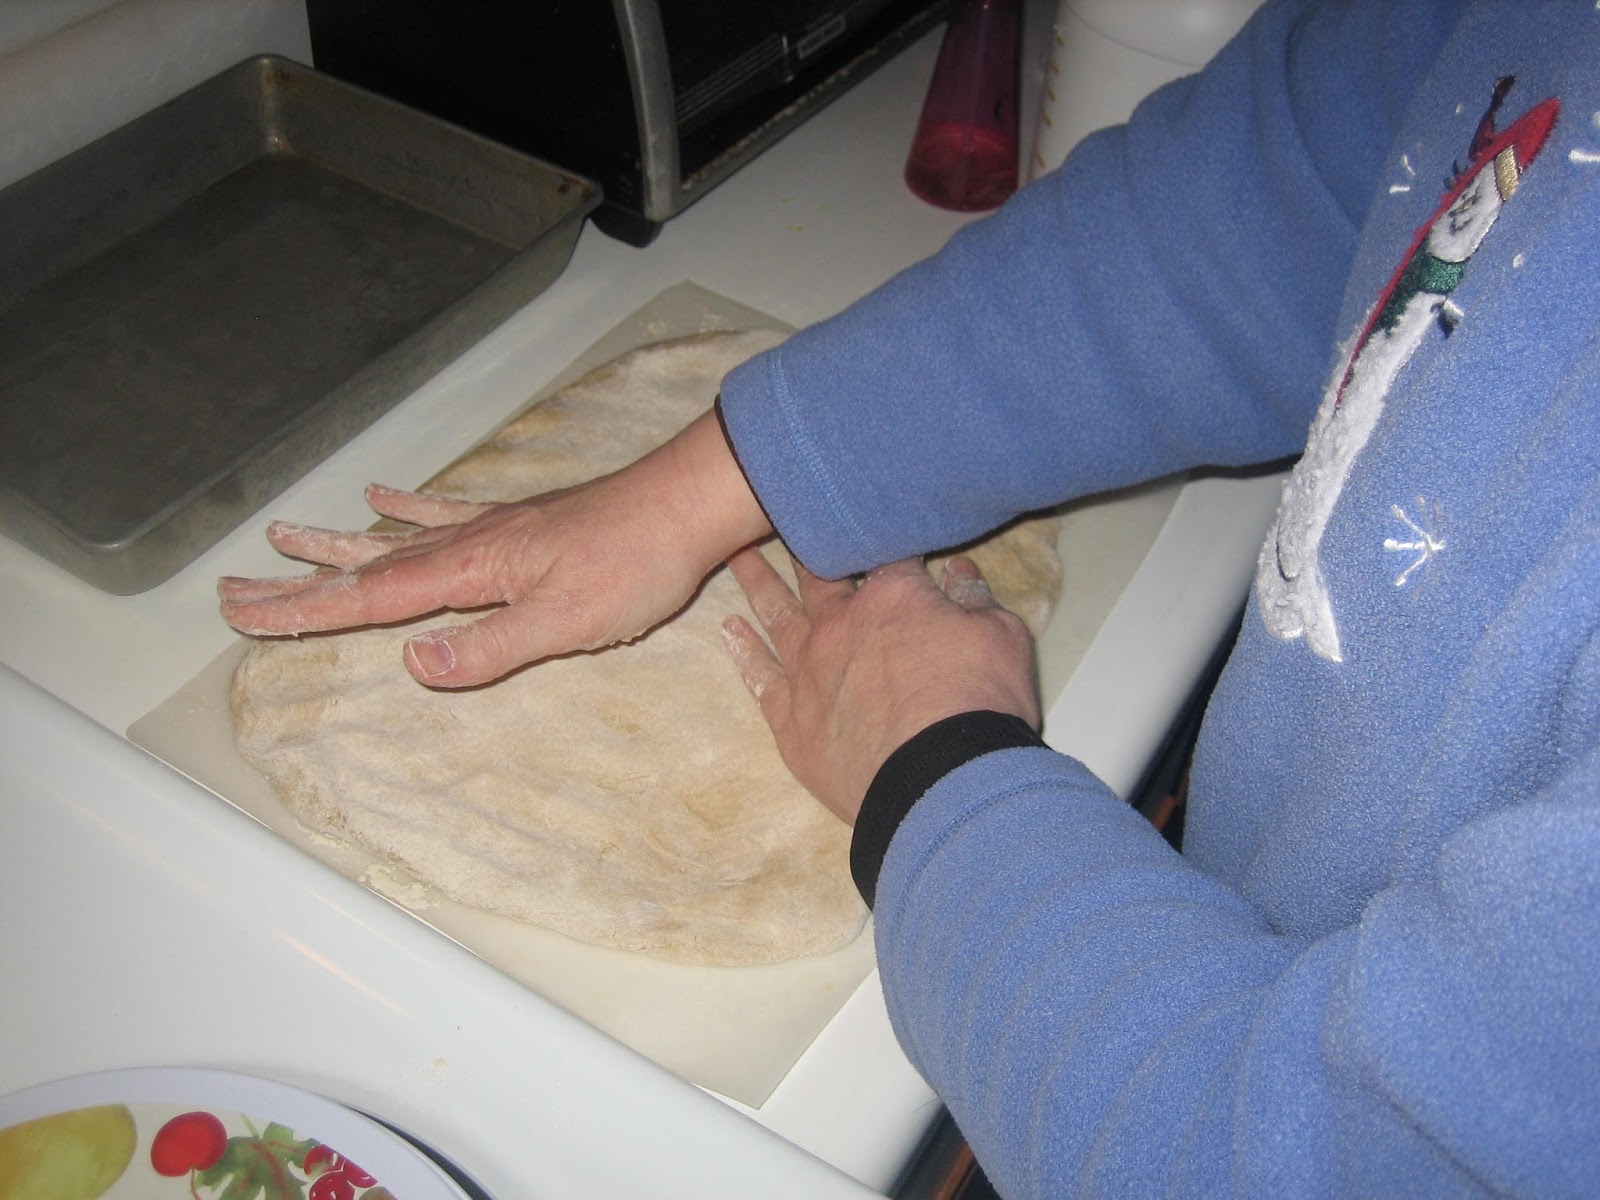
Flour your rolling surface. I use a 12" x 15" Plastic Cutting Mat (also from the dollar store).
"Cut" the batch in half with your hand, and lift it out of the pan.

Gently form it into a ball by tucking the edges under, and place it on the mat.

Flour it again.


 |
| flour regularly to keep it from sticking to the surface - but brush off excess flour |
 | |
| flip often |


Spread the surface with 1/2 Cup of Applesauce (I use one of those little lunch containers). Leave a margin at the top and bottom edges of the dough - about 1/2 inch. But, spread all the way to each side. Yes, you CAN use butter or margarine instead. But WHY? The applesauce is healthier, and I can't tell the difference in the finished product : )


Now, sprinkle VERY generously with Cinnamon Sugar mixture. I make my own - 4 parts sugar, 1 part cinnamon and refill the commercial container for cinnamon sugar in my cupboard.


At this point, if you'd like to sprinkle with an additional "goodie" such as raisins, nuts, or chocolate chips - go for it! : )
Now, you have two choices. You can either roll up into a log and cut into rolls - the traditional way. That will make mall-sized large Cinnamon Rolls. OR you can cut crosswise once with a pizza cutter, and cut into smaller strips and roll them up individually. That's the way I like to do it. It's really quick and is a little easier to control. Roll them from the center seam to the outside, uncovered edges. Then set them up on edge in the pan - with a little space between them so they can rise.


Place each roll into the oiled (or lined) cake pan (or cupcake pan, if you prefer)

Allow to rise on the counter for 2 hours (no need to cover - this is a very moist dough naturally).
OR cover loosely with plastic wrap and allow to rise overnight in fridge.

The next day, remove from the fridge and remove the plastic wrap. You will see that they have risen significantly in the fridge:

Preheat oven to 350 Degrees Fahrenheit
Bake at 350 degrees Fahrenheit for 30-35 minutes, or till golden brown.
They will rise a wee bit more in the oven.

Before serving, top with a glaze. (Note: If you're not going to eat these right away, they may be frozen without glaze. Keep the glaze in the fridge to add at serving time. To re-heat, Microwave till warm, then toast lightly in toaster oven or regular oven. Glaze after re-heating. Of course, EVERYONE eats their Cinnamon Rolls right away! But if you make a double batch, there is a chance you might freeze some before everyone gets to them ; )
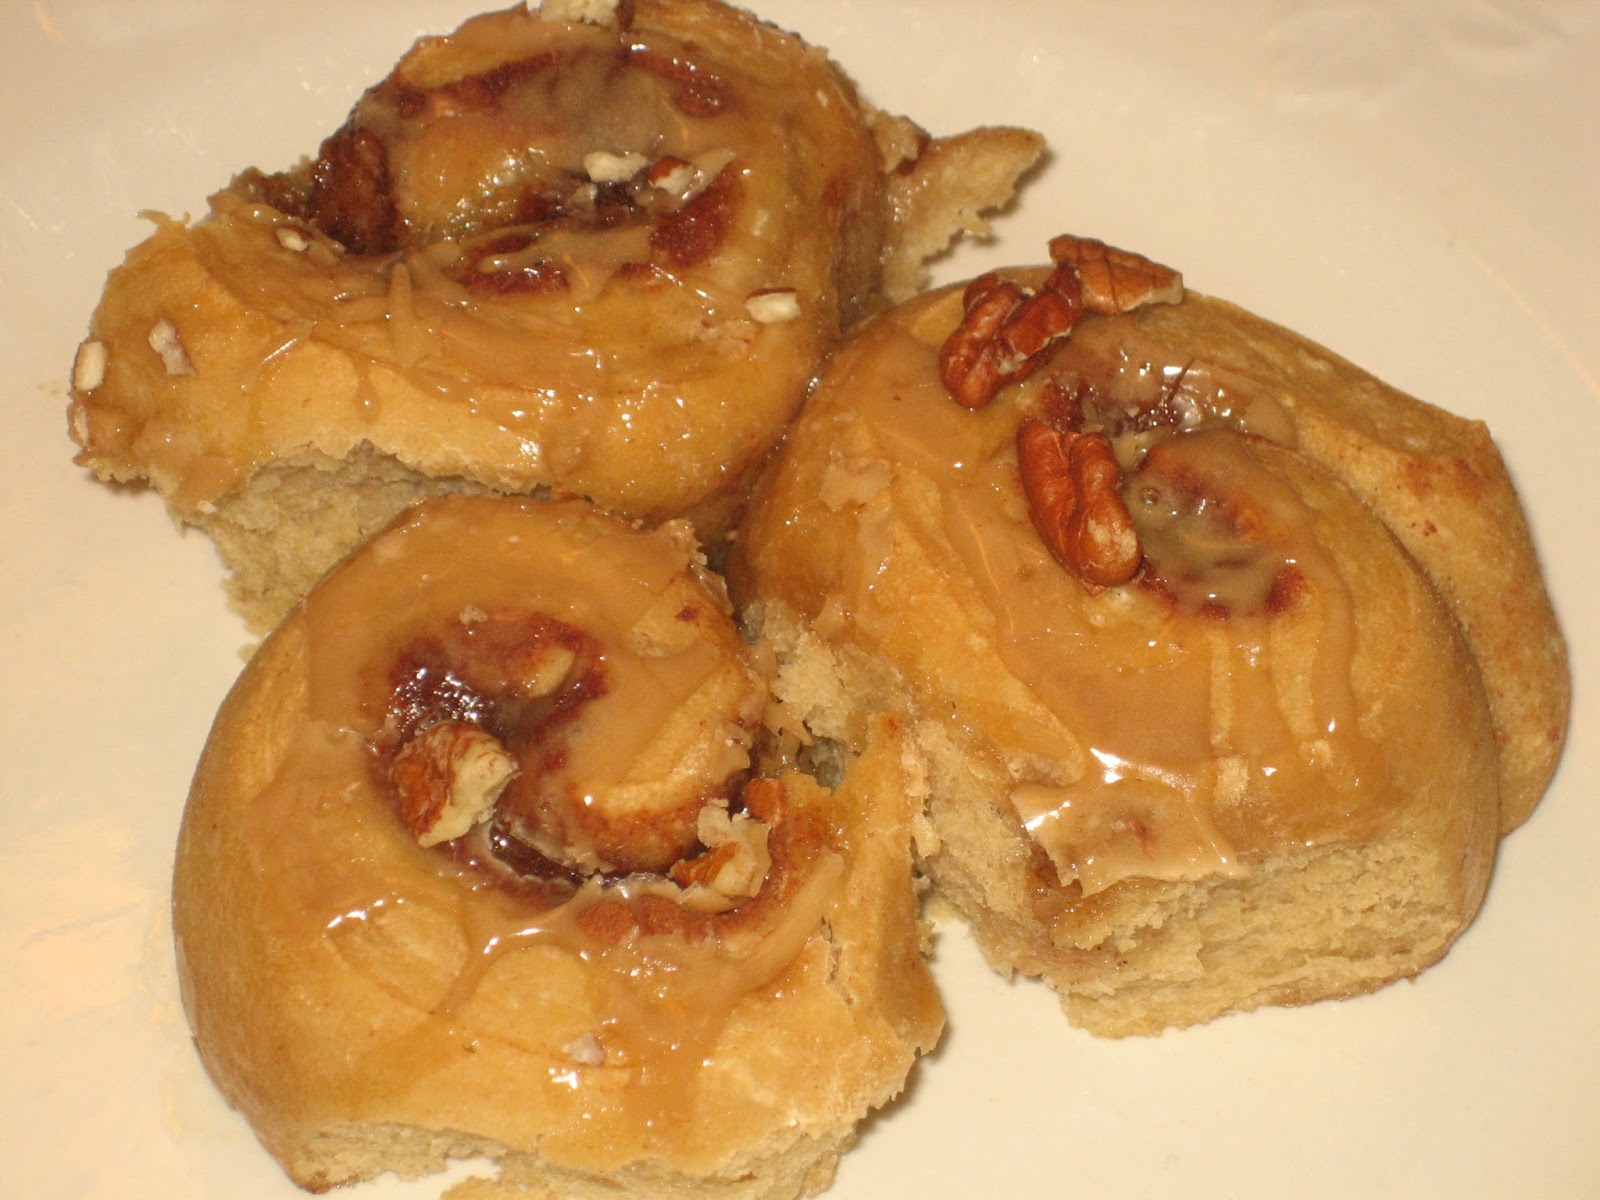 |
| Cinnamon Rolls with Maple Glaze & Pecans |
 |
| Cinnamon Rolls With Maple Glaze |
 |
| Cinnamon Rolls With Vanilla Glaze |
Here are two of my favorites:
Traditional Glaze:
Make in bowl with spoon
1 Cup Powdered Sugar
Mix in
1 Tablespoon Buttery Spread (Butter, margarine, Earth Balance - whatever)
then
1/4 Teaspoon Vanilla Extract (or other desired flavor, such as Almond or Lemon)
Add a few drops at a time, stirring well after each addition, to your desired texture
(You'll probably use less than a Tablespoon Total)
Non-Dairy or Dairy Milk of your choice
Oil Free Maple Glaze
1 1/2 Cups Powdered Sugar
1 Tablespoon Light Corn Syrup (such as Karo)
1 Tablespoon Non-Dairy or Dairy Milk of choice)
1/4 Teaspoon Maple Flavouring (other flavorings - such as Almond or Orange- may be substituted if desired)
Generous Dash of Salt
Additional Milk as needed:
Add a few drops at a time, stirring well after each addition, to your desired texture
Non-Dairy or Dairy Milk of your choice
Sprinkle with Nuts if desired.
Serve warm.
This is being shared on
What'd You Do This Weekend?
Modest Monday
Merry Monday
Smell Good Sunday
Tasty Tuesdays
Tuesdays with Twist
Happy Now
Healthy, Happy, Green & Natural
Penny Pinching Party
Wise Woman
Plant Based Potluck
These look and sound AMAZING! I'm a horrible baker but might have to go out of my comfort zone and try to make these some day! YUMMERS!
ReplyDeletehttp://MyBlissfulJourney.com
Jennifer